
Graduated Neutral Density Filters
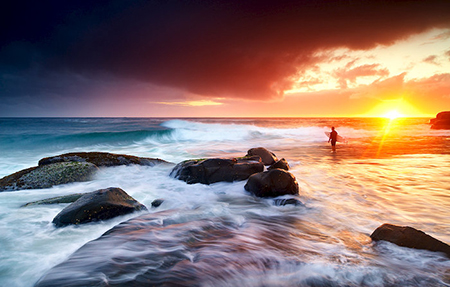
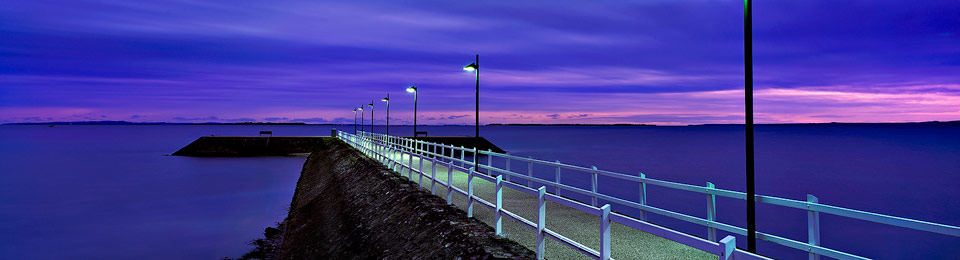
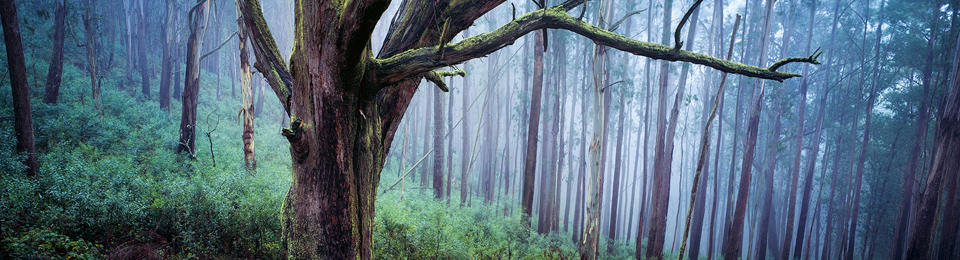
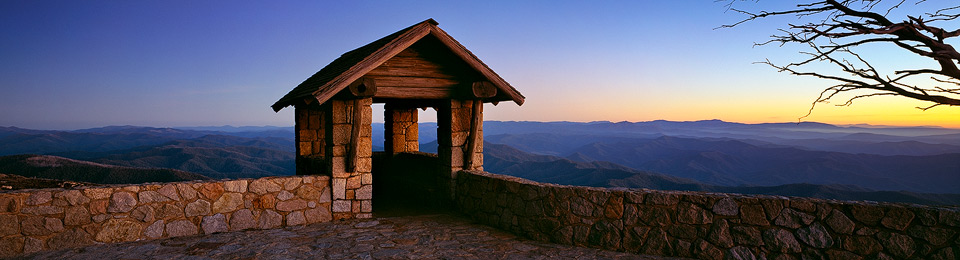
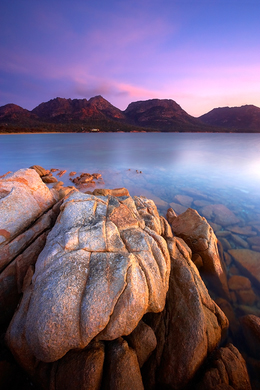
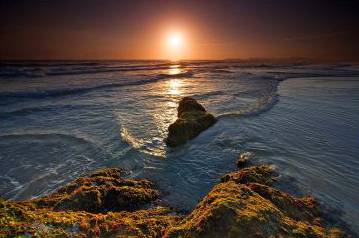
Many of our landscape images have been captured while using Graduated Neutral Density Filters or as you will often hear them called "ND Grads".
ND Grads work in exactly the same way as regular neutral density filters, in that they reduce the amount of light entering the lens, but they are as the name suggests "graduated".
This graduation from no ND effect to full ND effect, allows us to reduce the mount of light in one portion of the image, while the remainder of the image is not effected.
The graduation or "soft edge" of the neutral density portion of the filter, allows us to blend the darkening effect into the image and achieve a more natural appearance. This is not always easy though and careful selection/use of hard and/or soft graduations and the subsequent positioning of these within the image is vitally important for good results.
I hope to expand on position techniques in a later blog, but before I do this we need to look at a few of the ND Grad filter options that are available.
The Screw-on Filter:
Just like a regular UV filter (many of you will be using these for lens protection), the screw-on ND Grad is circular in shape and screws into your lens’ filter thread. Like all ND Grad filters, they come in a variety of densities (how much they reduce the light) and edges (how soft or hard the transition is from clear to ND)… unfortunately though, there is no way to adjust the positioning of these filters within the frame.
They screw into the filter thread remember, so where the graduation is positioned, is where it stays and there is no way of moving the filter up or down. You can rotate the filter however (by losening the thread) and this is handy to match off level features within your image, but not having the ability to move the filter up and down is a serious drawback.
For example, if your sunset horizon is 1/3 of the way down your image, you want to position your ND Filter 1/3 of the way down your image to match... But if your screw-on ND Grad has the ND 1/2 way on your filter (which they do) you have no option but to recompose your image so that the horizon is now 1/2 way down your image to match the filter.
This seriously affects compositional choices and for this reason alone, I would NOT recommend the purchase of “screw-on” ND Grads.
The Square Slide-in Filter:
This filter seems more practical, because no longer is the filter physically tied to the filter thread. Instead, a holder is placed on the lens and this holder provides the photographer with slots to slide one or more ND Grad filters in to.
Sounds like a winner yes? ….sadly No. :-(
The square shape of these filters does not provide the photographer with enough movement up and down, before the end of the filter can be seen within the image, especially with the wider Field Of View seen when shooting a vertical image. So these filters are only marginally better than the screw-on filter.
The Rectangular Slide-in Filter:
Now we’re talking!!
A rectangular filter is the obvious answer, as this provides the extra space top and bottom and this can be used position the graduation where it is needed, without the filter edge creeping into the shot.
Like all of the filters mentioned so far, these come in a variety of graduations, intensities and sizes. The photographer will generally have a selection of these in the kit, as each image is different and will require a different filter, or combination of filters to achieve the desired effect.
Filter Width:
OK, so we are using rectangular filters to allow better positioning…. But what size?
This will depend on the focal length of your widest lens. Let’s imagine that we are taking a photo with the camera in landscape orientation (horizontal) and that we are using an ND grad to hold back the sky exposure. The filter will be positioned with it’s longest side vertical (that is how the ND Grads are made) and this leaves us with the filter’s short width to cover our camera’s horizontal Field Of View.
So the width of the filter needs to be great enough, so that the edge of the filter and in fact the filter holder itself, is not seen in the side of our images.
Unfortunately I have no magic formula for you here, but from experience I can tell you that if shooting at 16mm on a 35mm film camera or a full frame digital, you will need to use the 100mm filter/holder system. This will generally allow 2 filters to be stacked, but if a third slot is used it will be seen within the image.
This holds true for focal lengths of 10mm when used on 1.5/1.6x APS-C cameras such as the D3200/650D etc.
Note: Some manufacturers offer special “wide” adapters for their holders to help cope with the wide Field Of Views. These include a holder that is limited to a single filter and/or a special mount ring that sits back over your lens when screwed on, rather than out in front… ask you supplier about these wide solutions for the system you are considering.
Now let’s think about what you shoot….
If you photograph landscapes with distant horizons that are basically straight and have no foreground elements that break into the sky area, then a “hard” edge filter would be useful. If you wish to simply darken the sky slightly, a 1-Stop filter would be useful. (Nice on those overcast days where cloud detail would otherwise be lost)
A 2-Stop filter would provide a greater darkening effect and a 3-Stop filter would be of benefit when the there is a large difference between sky and foreground eg at sunset.
Remember, you can stack the filters as well, so if you need more neutral density to really hold back the sky, then stack your 2 & 3 Stop for 5-Stops!! (5 stops will most likely no longer look natural, but some great effects can be achieved)
My personal recommendation would be to have at least a 2 and a 3 Stop hard in your kit for “straight” horizon shots.
If you have image elements that break into the sky area (eg a building), the hard filters become less useful, as it is impossible to hold back the sky without effecting the building also. Here the “soft” edged filter is required, as the more gradual darkening that it provides is more appealing over foreground elements.
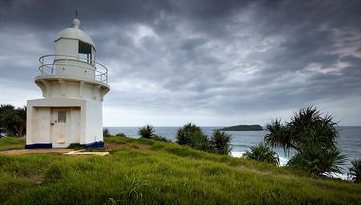
Again, good positioning is vital for good results, but there comes a point when one must consider that using any filter at all, may be detrimental to the image and perhaps a brighter sky is a better option if it maintains detail in other image elements.
If this is case, exposure bracketing and merging of these in post processing may be the answer, but I will talk more on exposure bracketing in a later blog entry.
My personal recommendation would be to have at least a 2 and a 3 Stop soft in your kit for “broken” horizon shots.
Brands:
There are a number of brands available and the old adage "You get what you pay for!" seems to apply. I personally use "Lee Filters" as I find them to be excellent quality, neutral in colour (yes some of the cheaper brands are not exactly neutral) and quite scratch resistant.
"Singh-Ray" are also extremely good and offer some quite unique graduations, plus they can even make to order.... if you are willing to pay that is!
Perhaps the most popular brand is "Cokin" ....I have used these in the past and my experience with them was not great, as I found they promoted a slightly magenta cast. Having said that, I will admit to only using the entry level filters from Cokin and cannot report one way or another on their "Pro" series filters, so by all means check them out.... especially if you are on a budget, as these are normally the cheapest of the group.
There are other manufacturers like B&W & HiTech and I would suggest that you Google "neutral density filters" and do a little research to find what is right for you.
I hope this helps you understand Graduated Neutral Density Filters a little more.
Cheers, Russell.
See more Landscape Photography Tips
Comments & Feedback